How to install and use Lightroom Mobile Presets
Hello friends!
This is a quick start guide on how to install and use my Lightroom mobile presets. If you’ve purchased one of my presets I want to thank you from the bottom of my heart for supporting my small business and allowing me to make a living doing what I love- living the dream!
If you don’t already have The Adobe Lightroom App - it is available for free on your phone through the App store (Apple) or Google Play (Android).
Downloading your presets:
Download the Lightroom Mobile presets of your choice in your phone.
Open the files by tapping on them, zipped files should automatically extract to your Files folder or your camera roll (the DNG preset files will appear to be a blank image file).
Installing the preset
3. Open the Lightroom app on your phone
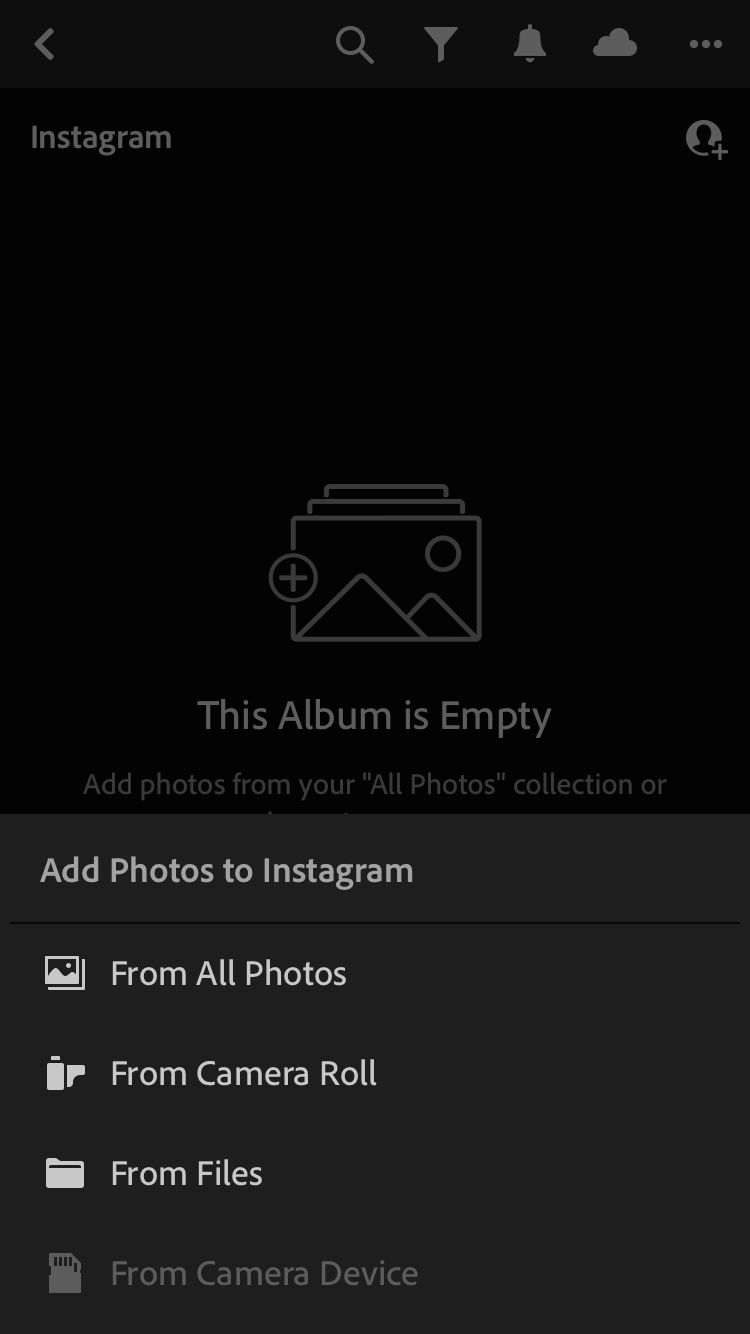
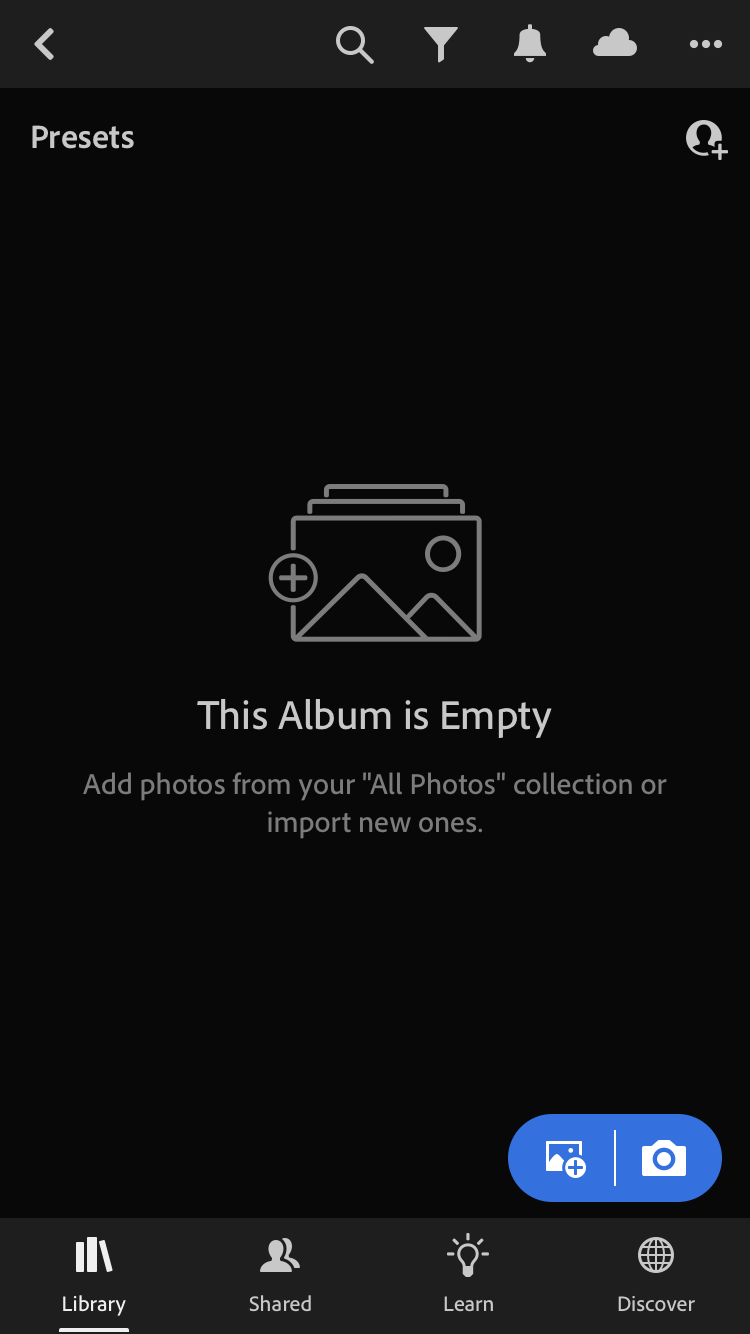
4. The preset is embedded inside DNG image files. To import the preset you add the preset image file into Lightroom by clicking the blue + button on either the lower right or top right of the screen (next to the camera icon).
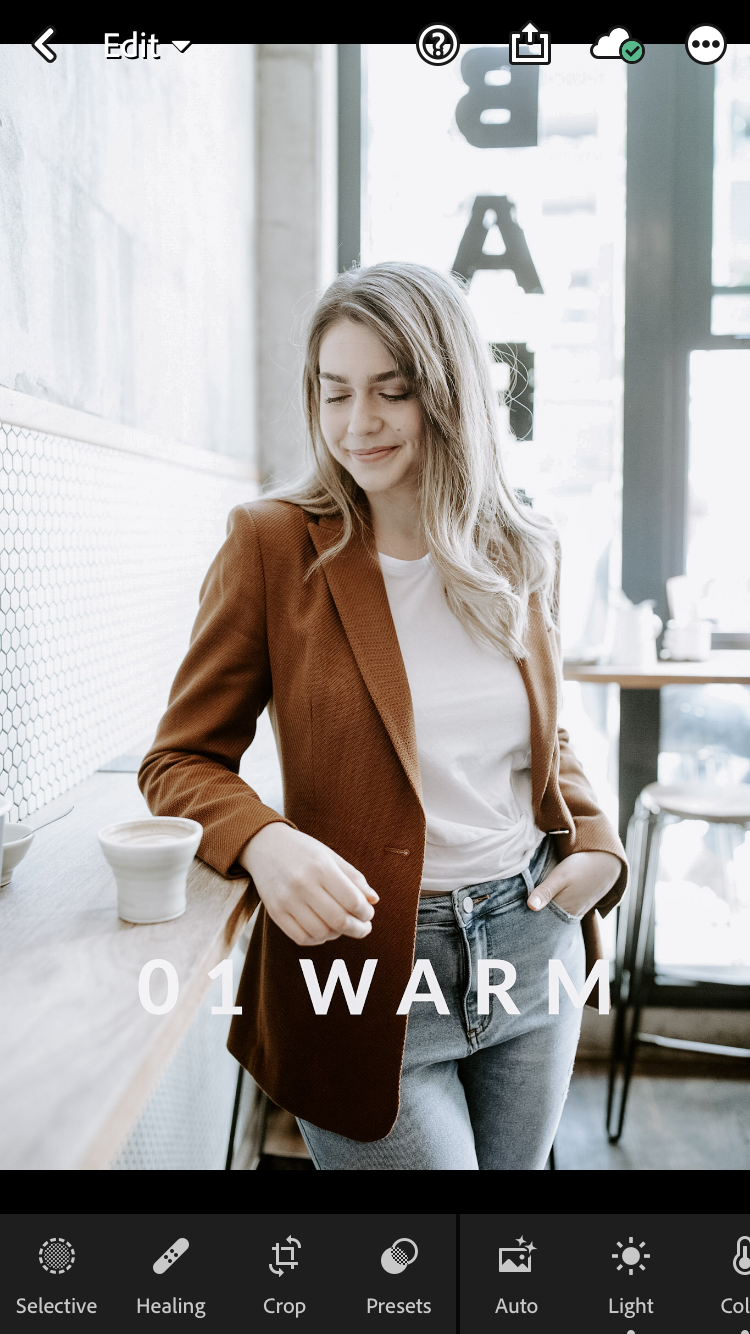
5. When you click on the image file, the preset image will appear. To import the settings from the image, click the icon with the three dots on the top right of the screen .
6 Select the ‘Create Preset’ option.
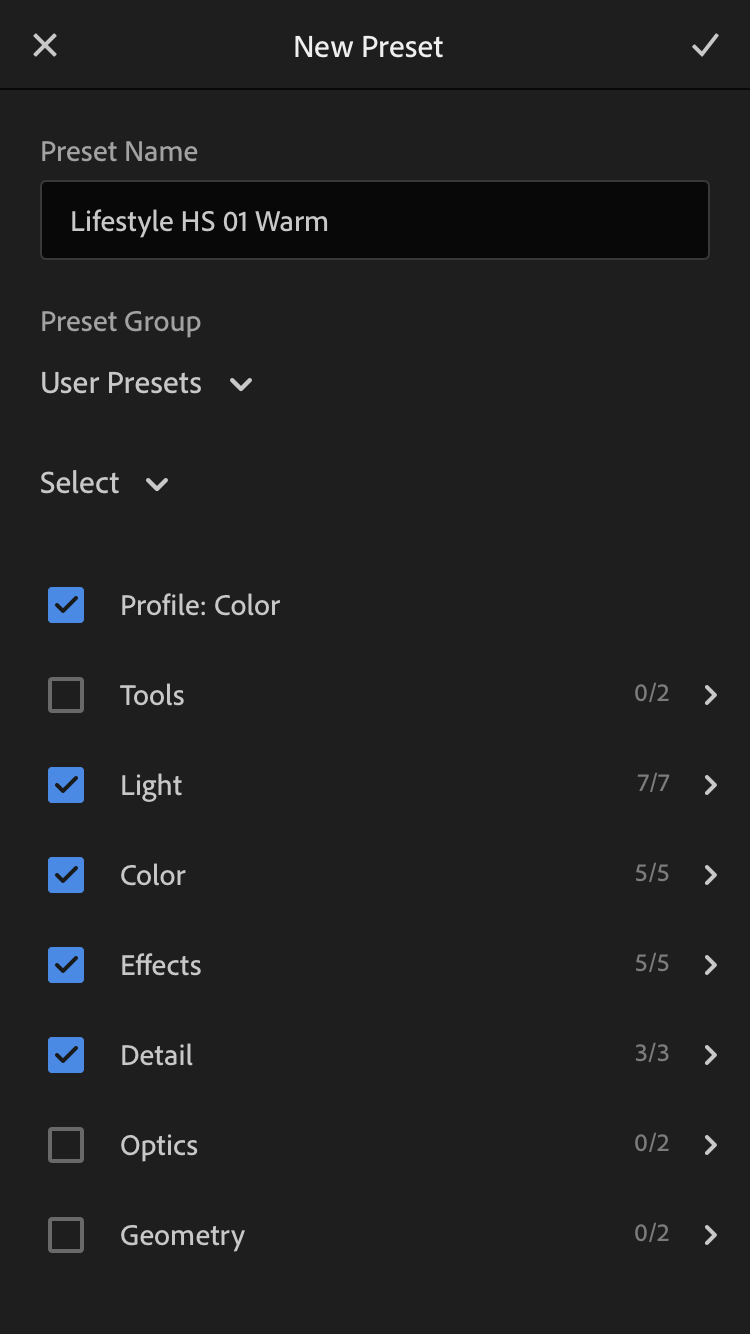
7. Name your preset.
8. Click ‘Color’, then deselect ‘White Balance’ on the menu (so that any adjustments you’ve made to correct White Balance before applying the preset will not be effected). This is completely optional, but I find that if you plan on adjusting white balance - it’s far easier to do it before a preset is applied than afterwards.
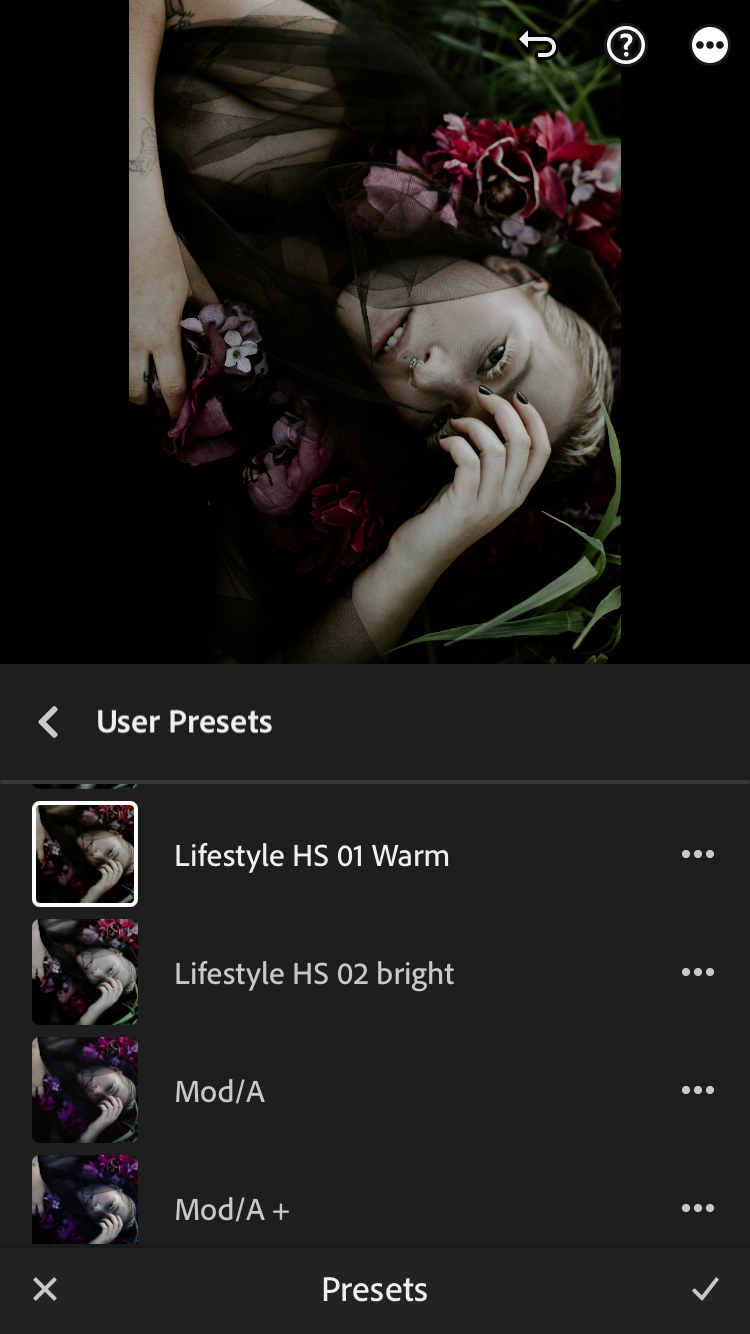
9. To use your new presets, open any of your images within the app, and tap ‘Preset’ on the menu at the bottom of the screen. Simply select your preset you want to apply from the drop down menu et voila!
(the Lifestyle Headshot presets that have been used in this tutorial are available here)
Fine tuning
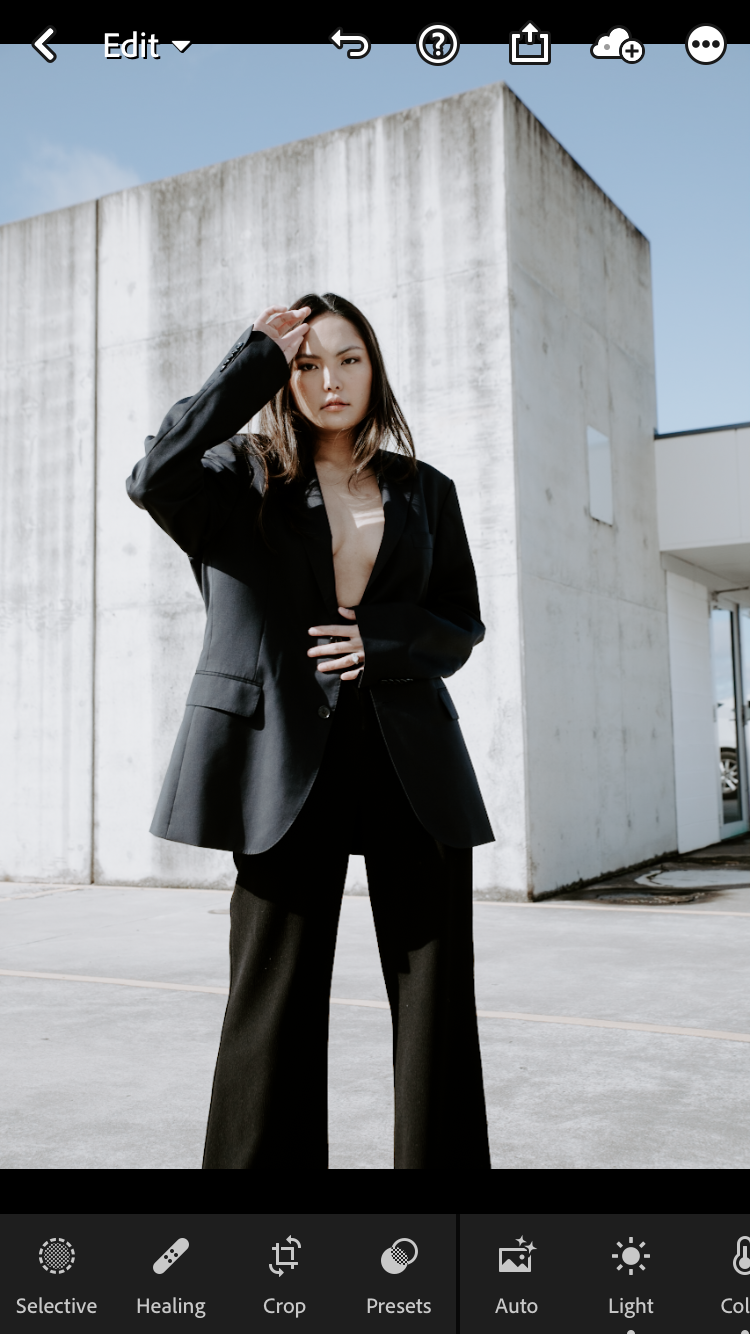
If your colour balance is totally off, it’s best to correct for that first in the ‘Color’ menu (adjust Temp and Tint only) before applying your preset. If the image is too dim or bright, adjust the Exposure (within the ‘Light’ option) AFTER the preset is applied.
In image below, the colour seemed a little blue / cold so I warmed up the image by increasing the colour temperature in the ‘Temp’ slider (moving towards the right)
Different screens will display colours differently, so you don’t need to worry about fine tuning it too much- as long as it’s in the ballpark it will be fine.
Hope you find this tutorial useful. If you have any further questions at all, or just to let me know how you’re going with these presets, send me an email on hello@jennywuphotography.com
I love seeing how other people are using my presets. If you’re happy for me to share your work to my social media, send your before/after images to me in an email and let me know how you would like to be tagged and credited.

